

How To Add Data To Elasticsearch
Getting started with Elasticsearch and Kibana
Permit's beginning by learning what Elasticsearch and Kibana are exactly.
Elasticsearch is an open source distributed, RESTful search and analytics engine capable of solving a growing number of use cases.
Kibana is an open up source data visualization dashboard for Elasticsearch. It provides visualization capabilities on top of the content indexed on an Elasticsearch cluster. Users can create bar, line and scatter plots, or pie charts and maps on superlative of large volumes of data.
This commodity will testify how to employ Elasticsearch and Kibana locally. If yous don't desire to host them locally you tin can run them on Amazon Spider web Services, Google Cloud, or Microsoft Azure.
Installation process
Elasticsearch
In this article, nosotros volition apply the 7.9.i version of Elasticsearch and Kibana. Note that when installing Elastic stack the version should be the same across the entire stack. This is a list of all stack products in the correct installation gild. Get here and find instructions on how to install Elasticsearch for your operating system. I will bear witness the procedure for Windows.
Click here to download a .zippo file. Unzip it with your preferred tool and you should become a elasticsearch-7.9.ane binder. I used 7-Naught. In the command line cd to this folder and run the elastic search using this command:
.\bin\elasticsearch.bat 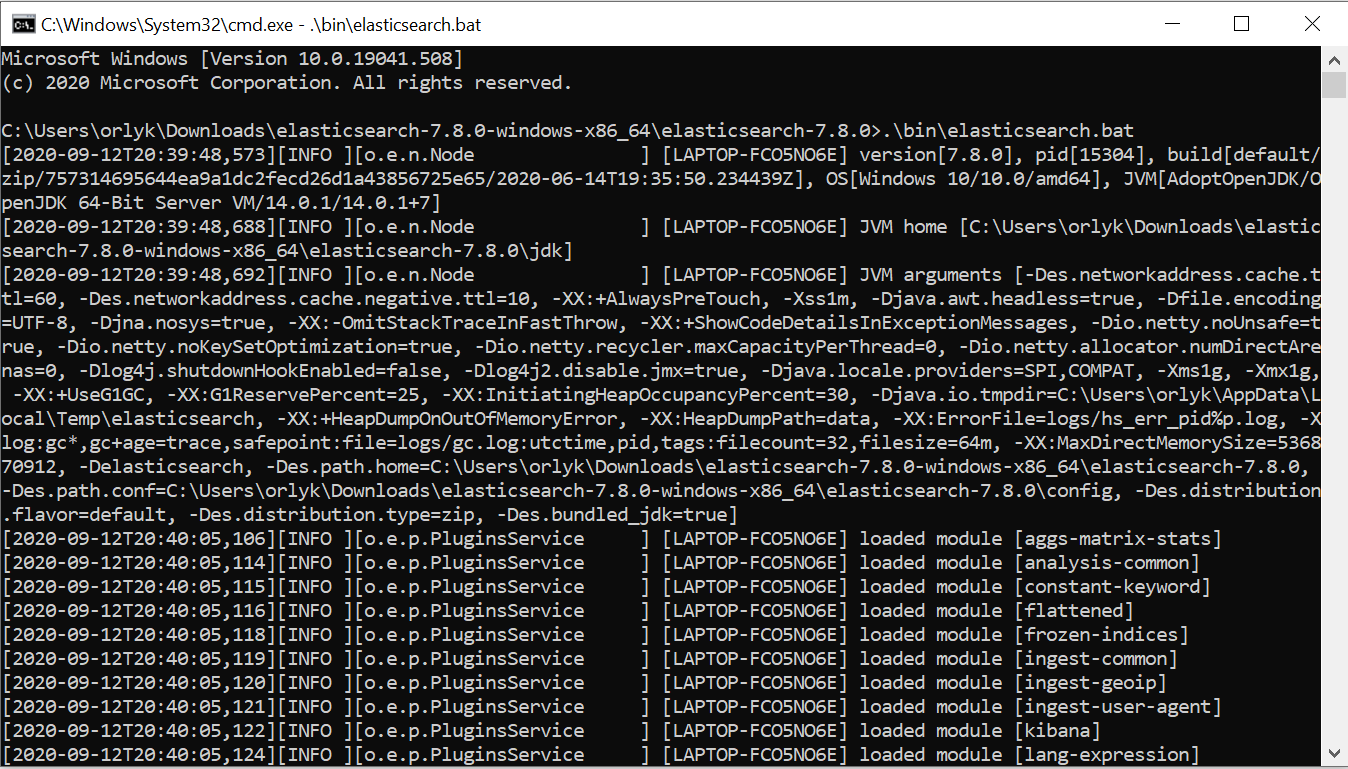
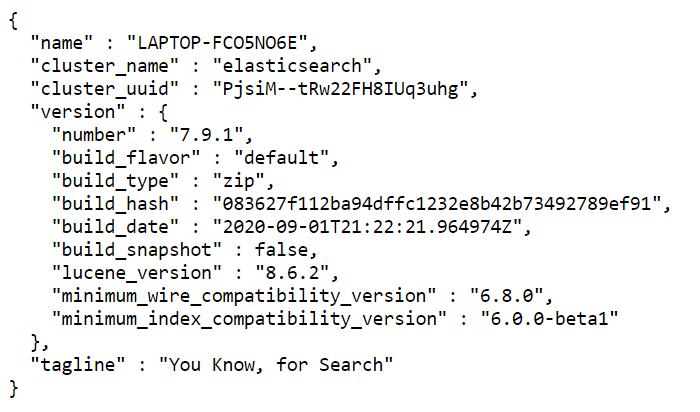
By default, Elasticsearch runs on the port 9200. Get to http://127.0.0.1:9200 and you should see this sort of information:
Kibana
At present allow's install Kibana. Go here to find the instructions on how to install information technology on your Bone. If you use Windows then yous should click on this link. Install a .zip file and unzip it to get a kibana-7.9.1 binder. In the control line cd to the location of this folder and run this command:
.\bin\kibana.bat Note that it may accept some time to run. By default, Kibana runs on http://127.0.0.1:5601.
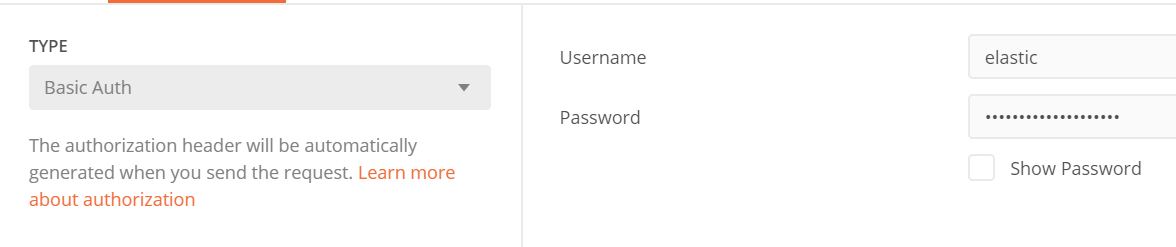
Add security
To brand Elasticsearch require credentials you need to add toconfig/elasticsearch.yml file the following:
          xpack.security.enabled: true
xpack.security.authc.api_key.enabled: true
Restart Elasticsearch and go to http://127.0.0.ane:9200 again. Now yous are required to pass login and a countersign. The same will happen if you get to Kibana home page.
To generate random passwords run this command:
bin/elasticsearch-setup-passwords auto If yous use Windows change / to \ .
You will get a list of passwords for all Elasticsearch stack.
To larn how to manually generate passwords go to https://www.elastic.co/guide/en/elasticsearch/reference/current/setup-passwords.html.
Now we need to modify config/kibana.yaml file by uncommenting/calculation elasticsearch.username and elasticsearch.countersign properties using values from generated passwords.
Making requests to add and modify data
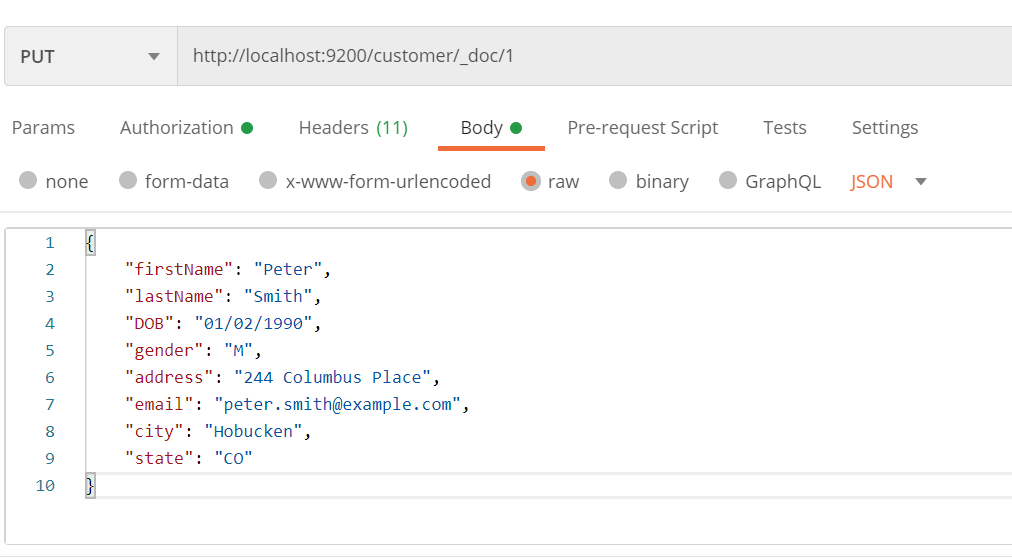
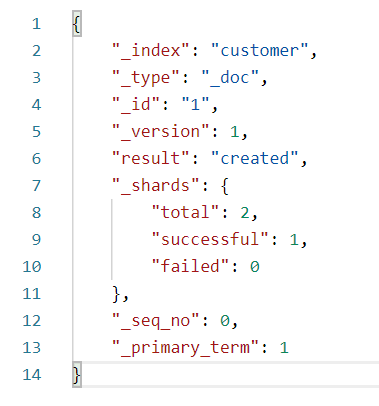
Allow's add a new document to a new alphabetize customer. When nosotros add a document to the nonexistent index, the index gets created automatically. To add a new document we demand to transport a PUT request to this URL:
{elasticsearchURL}/{index_name}/_doc/{document_id} In our instance elasticsearchURL is http://127.0.0.1:9200, index_name is "customer" and document_id could be 1. To brand requests I will use Postman.
Our customer will be this JSON object:
          {
            "firstName": "Peter",
            "lastName": "Smith",
            "DOB": "01/02/1990",
            "gender": "M",
            "address": "244 Columbus Identify",
            "email": "peter.smith@example.com",
            "city": "Hobucken",
            "state": "CO"
}
In add-on to a Content-Type header with a value application/json we should add together our user credentials since nosotros added security.
The response should exist this:
If you make a Get request to the same URL you lot will go the information that y'all accept merely POSTed.
To query all document inside the index make GET request to
{elasticsearchURL}/{index_name}/_search This is the body of the request:
{ "query": { "match_all": {} } }
Query and visualize data using Kibana
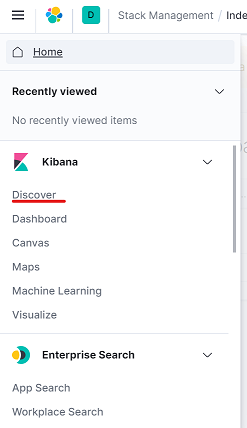
In Kibana go to Discover page:
We need to add together a new index pattern for Kibana. Click Create alphabetize pattern and gear up index pattern proper noun to client.
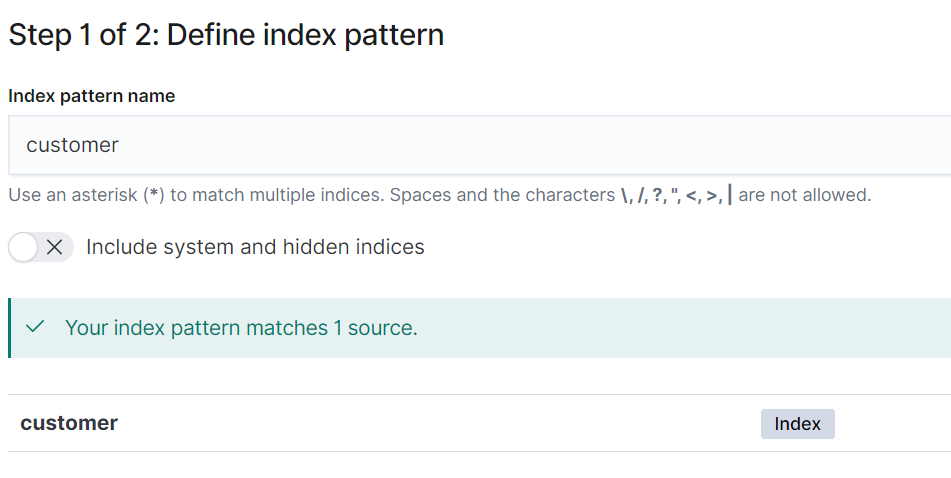
Click Next step and Create index pattern.
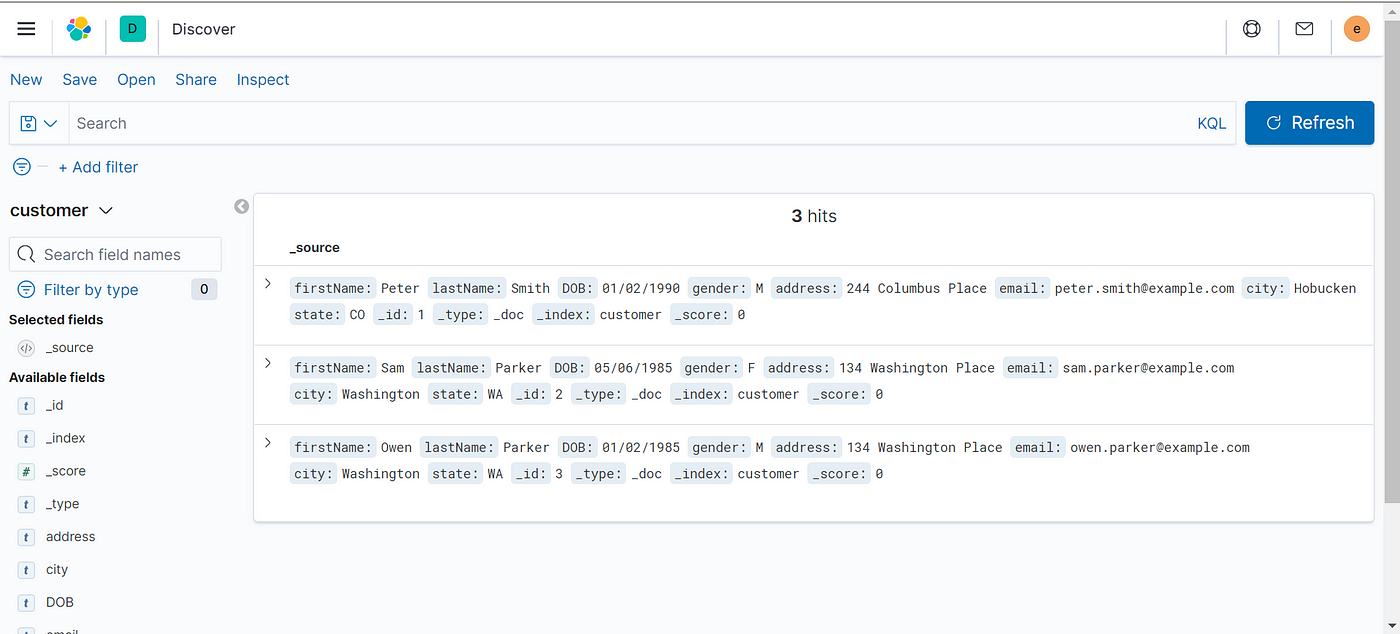
Now become again to Observe folio and you should see all the documents you have added. I have added two more customers:
On this folio, you can filter documents. This is a very convenient tool to query your data. Information technology also allows much more. But we will create merely just a simple bar chart.
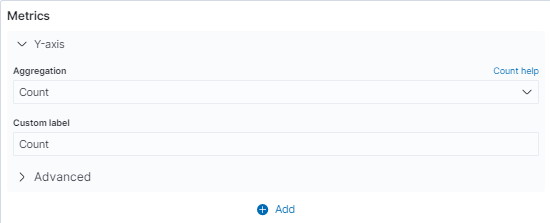
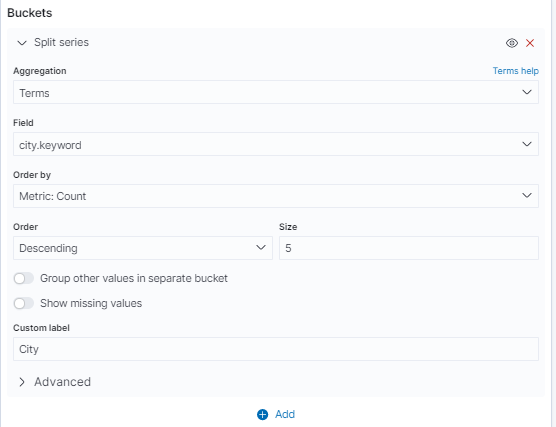
Get to the Vizualize page and click Create visualization, then click Horizontal bar, and select index customer. Add together a new Divide series saucepan. In the aggregation field select Terms, set field to be city.keyword and custom characterization to exist city, and click Update.
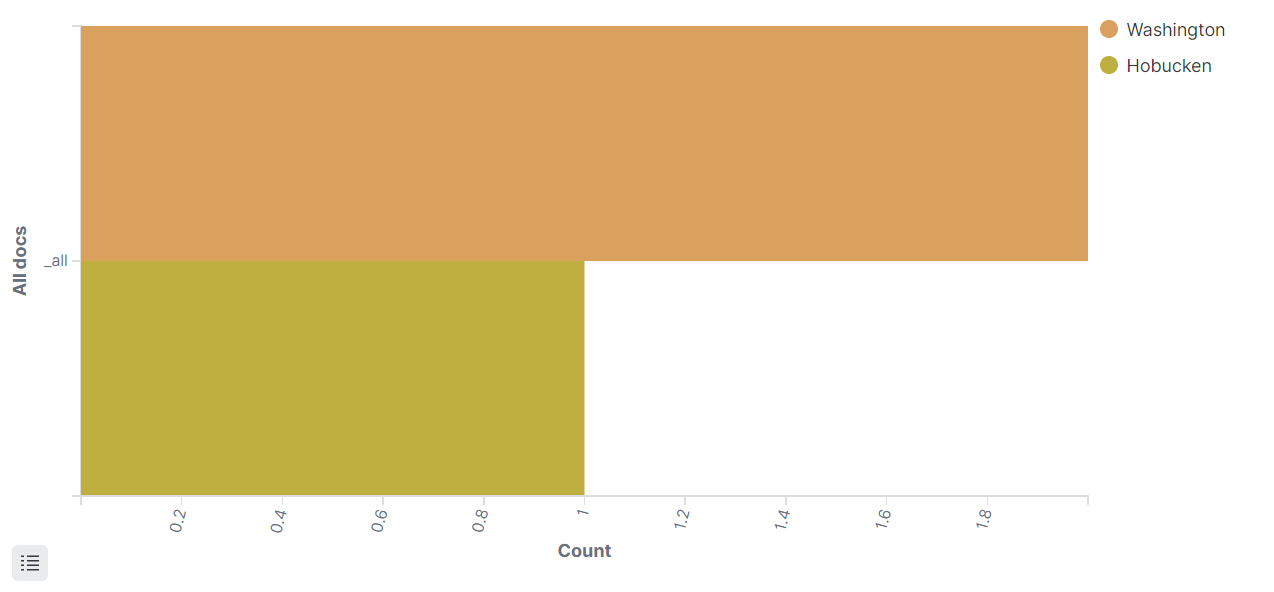
This is the cart I got:
Summary
In this article, nosotros have covered how to install and gear up Elasticsearch and Kibana. We learned how to add documents to index and how to query these data by making requests to Elasticsearch and by using Kibana. We too created a very simple nautical chart using the Kibana Visualization tool.

How To Add Data To Elasticsearch,
Source: https://medium.com/orlyknop/getting-started-with-elasticsearch-and-kibana-27e2841000fa
Posted by: moodybeftedind1982.blogspot.com
0 Response to "How To Add Data To Elasticsearch"
Post a Comment